Comprehensive Cost Overview for Manchester NH Roofing and Roof Replacement in 2025
Replacing a roof is one of the most significant home improvement investments a homeowner can make. Understanding the costs associated with this project in 2025 requires an in-depth look at various factors, including material choice, labor expenses, and regional pricing trends. This comprehensive cost overview will help you plan effectively and make informed decisions.
Average Roof Replacement Costs with a Roofer Manchester NH
The average cost to replace a roof in 2025 depends heavily on factors such as the size of your home, roofing material, and the complexity of your roof’s design.
| Roofing Material | Cost per Square Foot (Installed) | Average Total Cost for a 2,000 Sq. Ft. Roof |
| Asphalt Shingles | $3 – $6 | $6,000 – $12,000 |
| Metal Roofing | $7 – $14 | $14,000 – $28,000 |
| Wood Shakes/Shingles | $8 – $12 | $16,000 – $24,000 |
| Clay or Concrete Tiles | $10 – $20 | $20,000 – $40,000 |
| Slate Roofing | $15 – $30 | $30,000 – $60,000 |
These figures are averages and may vary depending on where you live and other specific circumstances.
Key Factors Affecting Roof Installation Manchester NH Costs
Several elements influence the overall cost of replacing your roof.
- Roof Size
Larger roofs naturally require more materials and labor hours to replace. A professional roofer measures in “squares,” with one square equaling 100 square feet of roofing material. - Material Type
The choice of roofing material significantly impacts costs. While asphalt shingles remain the most budget-friendly option for many homeowners, premium materials like metal or slate offer greater longevity but come with higher upfront expenses. - Labor Charges
Labor costs vary based on location and contractor experience. Skilled roofers typically charge more but deliver quality work that lasts longer. - Roof Design Complexity
A simple gable roof will be less expensive to replace than a complex design featuring multiple slopes or dormers that require additional cutting and fitting. - Permits and Inspections
Local building codes may necessitate permits or inspections during the replacement process. Be sure to account for these fees when budgeting.
Hidden Costs to Consider for Roof Replacements Manchester NH
- Roof Deck Repairs:If there is damage beneath your existing shingles or tiles (such as rotting wood), this will need to be addressed before installation begins.
- Removing Old Roofing Material:Some contractors charge extra for tearing off old roofing layers prior to installing new material.
- Disposal Fees:The cost of disposing of old roofing debris can add up depending on waste disposal regulations in your area.
- Upgrades:If you decide to invest in energy-efficient features like reflective coatings or improved insulation underlayments, expect higher upfront costs but potential long-term savings on utilities.
Budgeting Tips for Homeowners
To manage your roof replacement costs effectively:
– Request quotes from multiple licensed professionals to compare options without sacrificing quality. – Choose durable materials that align with both your budget and long-term goals. – Ask about warranties offered by manufacturers and contractors; these can save money down the line if repairs are needed.
Re-roofing is undoubtedly an investment but remains crucial for maintaining the safety and value of your home over time. Taking time now to understand pricing trends will put you in a better position when deciding how best to approach replacing your roof in 2025 while staying within budget constraints.
Finding the Right Roofing Contractor Manchester NH: What It Costs to Replace Your Roof
When it comes to replacing your roof, understanding the costs involved can help you make informed decisions. A roof replacement is a significant investment, and several factors can influence the overall expense, so choose the contractor you hire wisely. We recommend manchesterroofing.net. Here’s a detailed breakdown to guide you through what to expect.
Key Components Impacting Roof Replacement Costs
Replacing your roof involves more than just purchasing new materials.
- The larger the roof, the more materials and labor are required. Roof size is typically measured in squares (1 square = 100 square feet).
- For example:
| Roof Size (Square Feet) | Number of Squares | Estimated Cost Range |
|————————-|——————-|———————–|
| 1,500 | 15 | $7,000 – $10,500 |
| 2,000 | 20 | $9,500 – $14,000 |
Costs vary depending on material and labor rates. - Materials significantly impact overall pricing.
- Asphalt Shingles: Most affordable and widely used ($3-$5 per square foot).
- Metal Roofing: Durable but more costly ($8-$16 per square foot).
- Tile Roofing: Long-lasting but heavy ($12-$25 per square foot).
- Labor Costs
Labor expenses vary depending on location and project complexity. Hiring skilled professionals ensures quality work but may increase costs by $1-$4 per square foot. - Roof Pitch and Accessibility
Steeper roofs or those with complex designs are harder to work on, increasing installation costs due to additional safety measures and time required. - Geographical Location
Urban areas tend to have higher labor rates compared to rural regions due to variations in market demand.
Additional Expenses Often Overlooked
- Old Roof Removal:Removing existing shingles or tiles can add $1-$5 per square foot.
- Underlayment Replacement:Damaged underlayment may need replacement for proper protection against leaks.
- Permit Fees:Local regulations may require permits for roofing projects, typically costing between $150 and $500.
- Structural Repairs:Unforeseen damage (e. g. , rotting wood or mold issues) uncovered during installation can lead to additional repair expenses.
Cost-Saving Strategies for Roof Replacement
- Obtain multiple quotes from licensed contractors for better pricing insights.
- Explore financing options or consider insurance claims if damage resulted from natural disasters.
- Choose materials suited for your budget while balancing durability and aesthetics effectively.
- Schedule replacements during off-season periods when demand is lower; this can often lead to reduced labor costs.
By focusing on these details and planning accordingly, homeowners can make financially sound decisions when replacing their roofs while ensuring long-term durability for their homes.
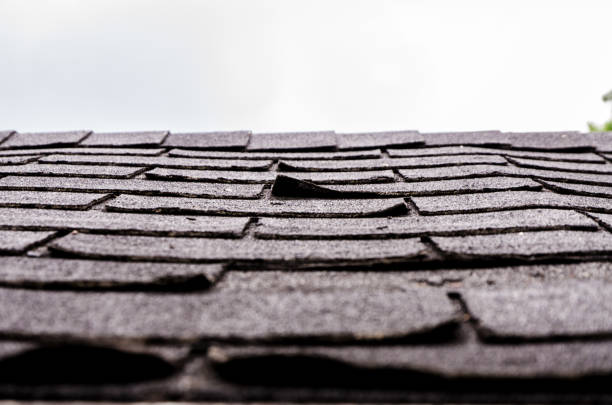
Recognizing the Signs That Indicate It’s Time to Replace Your Roof
Knowing when your roof needs replacement is crucial for protecting your home and avoiding costly damages. Over time, wear and tear or external factors like severe weather can degrade the integrity of your roofing system.
– Asphalt Shingles: Typically last 20 to 25 years.
– Metal Roofs: Can last between 40 to 70 years, depending on material and maintenance.
– Clay or Concrete Tiles: Known to endure for over 50 years in many cases.
If your roof has reached or exceeded its expected lifespan, it may be time to start planning for a replacement.
Examine your roof for any physical damage that could compromise its effectiveness.
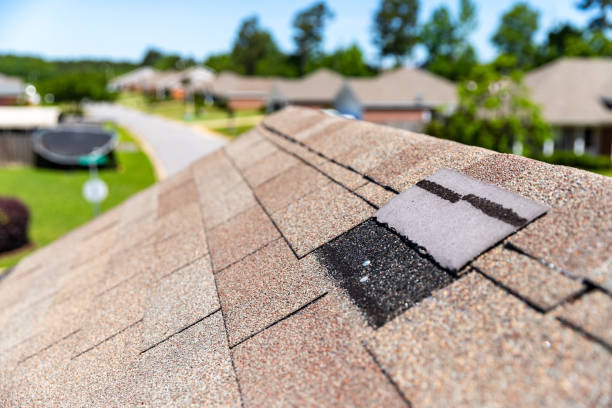
– Curling, cracking, or missing shingles.
– Bald spots on shingles where granules are missing.
– Rust or corrosion on metal roofing materials. – Damaged flashing around chimneys, vents, or skylights.
These issues often indicate significant wear that can leave your home vulnerable to leaks.
Water stains on ceilings and walls inside your home could point to a failing roof. If you notice discoloration, peeling paint, or dripping water during rainfall, it’s likely that moisture is penetrating through weakened areas in the roof.
A sagging roofline is typically an indicator of structural damage caused by moisture exposure or compromised roofing supports. This issue requires immediate attention as it presents safety risks.
| Symptom | Possible Cause | Action Required |
| Sagging sections | Moisture damage; weakened structure | Consult a professional |
| Uneven surfaces | Improper installation; aging wood | Evaluate need for reroofing |
If you’ve noticed an unexplained rise in heating or cooling costs, it might be due to poor insulation caused by damaged roofing materials. A failing roof allows air exchange between the interior and exterior, reducing energy efficiency.
Excessive moss growth on shingles traps moisture and accelerates deterioration over time. Similarly, mold inside the attic can result from inadequate ventilation due to roofing problems.
Proactive Maintenance Recommendations
- Schedule regular inspections (annually or after major storms).
- Keep gutters clean and free from debris to ensure proper drainage.
- Address minor repairs promptly before they escalate into larger issues.
Understanding these warning signs enables homeowners to act promptly before minor problems evolve into extensive damage requiring costly replacements—protecting both their investment and peace of mind long-term.
Breaking Down the Average Costs of Replacing Your Roof
When considering a roof replacement, understanding the average costs involved can help you plan your budget effectively. Roof replacement is a significant investment, but it is essential for protecting your home and maintaining its structural integrity. Below, we break down the costs associated with replacing your roof to give you a clearer picture of what to expect in 2025.
National Averages for Roof Replacement
| Roof Type | Average Cost per Square Foot | Average Total Cost (2,000 sq. ft. Roof) |
| Asphalt Shingles | $3 – $5 | $6,000 – $10,000 |
| Metal Roofing | $7 – $12 | $14,000 – $24,000 |
| Wood Shakes | $8 – $14 | $16,000 – $28,000 |
| Clay or Concrete Tile | $10 – $25 | $20,000 – $50,000 |
| Slate Roofing | $15 – $30 | $30,000 – $60,000 |
These figures represent general averages for 2025 and may fluctuate based on factors such as labor costs and supply chain availability.
Key Cost Components
Several components contribute to the overall cost of replacing your roof.
- The type of material chosen significantly impacts cost.
- Asphalt shingles are the most affordable option.
- Premium materials like slate or clay tiles come at a higher price but offer enhanced durability.
- Labor accounts for 40% to 60% of total expenses.
- Rates vary by region and contractor experience.
- Larger roofs require more materials and labor.
- Steeper-pitched roofs increase safety risks and installation difficulty.
- Removing the old roofing adds to expenses.
- Average tear-off costs range from $1 to $2 per square foot.
- Skylights or chimneys may raise costs due to extra work required for flashing or sealing around them.
- Upgraded underlayment or ventilation systems will also add value—and expense—to your project.
Hidden Costs You Shouldn’t Overlook
- Structural Repairs:If there is rot or damage beneath your current roof deck.
- Building Permits:Some municipalities require permits that can cost anywhere from $100 to several hundred dollars.
- Waste Disposal Fees:Disposing of old materials may incur landfill charges.
Tips for Managing Roof Replacement Costs
- Obtain multiple quotes from reputable contractors before making a decision.
- Explore financing options such as home improvement loans if upfront costs are prohibitive.
- Invest in durable materials that reduce long-term maintenance needs.
By breaking down these components and planning strategically, homeowners can achieve an efficient yet budget-friendly roofing solution suited to their specific needs in 2025.
Understanding these variables can help homeowners make informed decisions and budget effectively for this critical home improvement project.
1.Roof Size and Complexity
- Pitch and Slope: Steeper roofs are harder to install, requiring more time and specialized equipment, which increases labor costs.
- Number of Stories: Multi-story homes often require additional safety measures or labor efforts, which can drive up pricing.
| Roof Type | Estimated Labor Difficulty | Cost Impact |
| Flat Roof | Low | Lower |
| Moderate Slope | Medium | Average |
| Steep Slope | High | Higher |
2.Type of Roofing Material
The choice of roofing material significantly affects the total cost.
- Asphalt Shingles: Affordable, durable, and popular for residential roofs.
- Metal Roofing: Long-lasting with higher upfront costs but lower lifetime maintenance.
- Clay Tiles: Premium choice with excellent durability but higher installation fees due to weight.
| Material | Average Cost Per Square Foot Installed (2025) |
| Asphalt Shingles | $4 – $8 |
| Metal Roofing | $9 – $15 |
| Clay Tiles | $15 – $25 |
| Slate Roofing | $20 – $30 |
3.Labor Costs
Labor makes up a significant portion of the overall expense. Rates may differ based on: – The contractor’s skill level or certification. – Geographic location—urban areas typically have higher labor costs than rural ones. – Seasonal demand—roofing projects during peak seasons may come at a premium due to high demand.
4.Roof Removal and Disposal Costs
– Disposal fees apply for dumping old roofing debris in landfills or recycling centers.
To save on disposal costs, check if your contractor offers recycling options for materials like metal or asphalt shingles.
5.Additional Features
Certain features may add complexity or additional expenses to your roof installation: – Skylights or chimneys that need flashing around them. – Custom ventilation systems for energy efficiency. – Gutters that may need upgrades during roof replacement.
By evaluating these factors before starting your roofing project, you can better estimate your budget while selecting options that suit your needs without compromising quality. Careful planning ensures you make optimal choices while staying within financial limits.
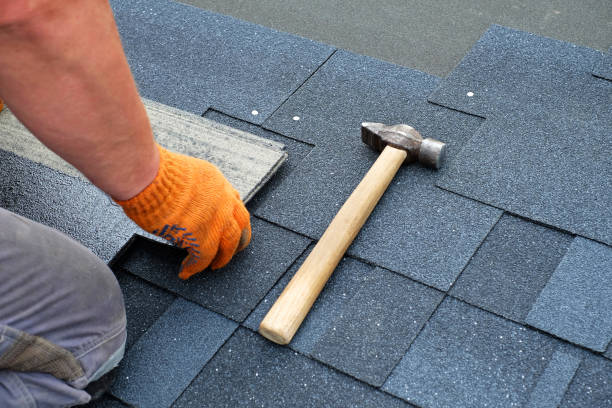
Should You Replace Your Roof Yourself or Hire a Professional Roofer?
When it comes to replacing your roof, deciding between a DIY approach and hiring a professional is one of the most important decisions you’ll make. Both options have their benefits and drawbacks, and understanding these factors can help you make an informed choice that aligns with your budget, skill level, and long-term goals.
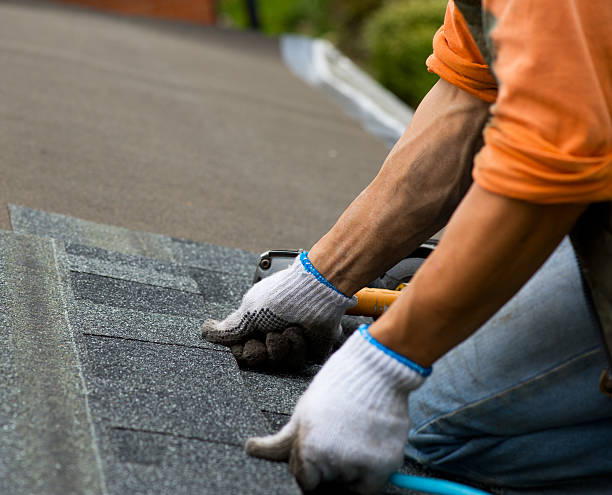
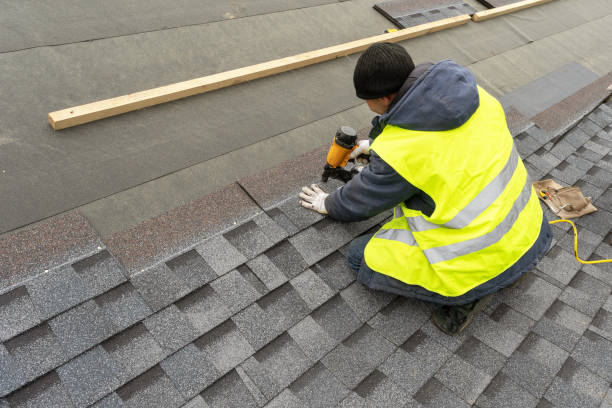
Benefits of Hiring a Professional Roofer
- Expertise and Experience:
Professional roofers bring years of experience to the table. They are trained to handle various types of roofing materials and have the expertise needed to ensure a durable installation. - Safety:
Roofing involves working at heights, which can be dangerous without proper equipment or training. Professionals not only have specialized tools but also know best practices for maintaining safety during installation. - Time Efficiency:
A professional team can complete the job in a fraction of the time it might take an inexperienced homeowner to do it themselves. - Warranty Protection:
Many roofing contractors offer warranties on their workmanship as well as the materials they use. This guarantees peace of mind in case any issues arise after installation. - Access to High-Quality Materials:
Professionals often have access to better roofing materials at wholesale prices, which may not be available to individual homeowners.
Benefits of Replacing Your Roof Yourself
- Cost Savings:
Labor costs can account for 40-60% of a roofing project’s total expense when hiring professionals. Managing the labor yourself could lead to significant savings. - Complete Control Over the Project:
By doing it yourself, you maintain full control over every aspect—from material selection to timeline management—ensuring everything is done exactly how you want it. - A Learning Opportunity:
Taking on such an intensive project is an invaluable learning experience for anyone looking to expand their skill set in home improvement.
That said, DIY projects come with serious risks if not approached correctly.
Considerations Before Choosing DIY
- Do I have sufficient knowledge about proper roofing techniques?
- Am I capable of safely working at heights for extended periods?
- Do I own or can I rent all necessary tools?
- Is my current schedule flexible enough for a lengthy project?
If you answer “no” to any of these questions, it might be worth reconsidering whether DIY is truly the best path forward for you.
Cost Comparison Table
| Factor | Hiring Professionals | DIY Approach |
| Labor Costs | $3,000-$7,000 (average) | $0 (your own labor) |
| Material Costs | Varies (wholesale available) | Retail pricing |
| Equipment Rental | Included in contractor fee | $200-$500 (ladders/scaffolding) |
| Time Commitment | 2–5 days | Several days/weeks |
Key Risks Associated with DIY Roofing Projects
- Improper Installation: Poor technique or material handling can lead to leaks or structural issues that may cost more in repairs down the line.
- Injury Risk: Without proper training or safety gear (such as harnesses), falls from roofs are among the most common home improvement-related injuries.
- Voided Warranties: Many manufacturers void material warranties if products are improperly installed by non-professionals.
- Hidden Damage Missed: Professionals are adept at identifying underlying issues like rotting wood or insufficient insulation—details an untrained eye might miss entirely.
Making the Best Choice
Ultimately, deciding whether to hire professionals or replace your roof yourself depends on multiple factors including budget constraints, personal expertise, and time availability. While professionals bring efficiency and expertise along with warranties that safeguard their work quality, those confident in their abilities may find satisfaction—and savings—in undertaking this challenge themselves.
Should You Replace Your Roof Yourself or Hire a Professional Roofer?
When faced with the need for a roof replacement, many homeowners grapple with whether to tackle the project on their own or hire a professional roofer. Both options have their pros and cons, and understanding them can help you make an informed decision.
The Pros and Cons of DIY Roof Replacement
Pros: – Cost Savings:One of the primary advantages of replacing your roof yourself is the potential to save money on labor costs, which typically account for 60% or more of the total expense.Control Over Timing:When managing the project yourself, you control when and how quickly it gets done.Learning Opportunity:Replacing your roof can teach valuable skills in home improvement and construction.
Cons: – Safety Risks:Roof replacement is hazardous. Slips, falls, and injuries are common without proper equipment and experience.Lack of Experience:Without professional expertise, mistakes can occur, leading to improper installation or structural issues.Time Commitment:A DIY roof replacement often takes significantly longer than hiring professionals.
Benefits of Hiring a Professional Roofer
Professional roofers bring experience, tools, and efficiency to the table.
- Expertise:Professionals have extensive training in handling various roofing materials and navigating complex installations. This ensures high-quality results that meet industry standards.
- Safety Assurance:Roofing companies use safety equipment such as harnesses, scaffolding, and protective gear to minimize risks during installation.
- Warranty Protection:Many contractors offer warranties on labor and materials. This provides peace of mind in case issues arise after installation.
- Time Efficiency:With experienced crews working together, most roofing projects are completed within days rather than weeks.
Cost Comparison Table: DIY vs. Professional
| Factor | DIY Replacement | Professional Replacement |
| Labor Costs | $0 (your time) | $2,000 – $5,000+ |
| Equipment/Tools | $500 – $1,500 (one-time cost) | Included in contractor fees |
| Risk Level | High | Low |
| Time Required | Several weeks | 2–5 days |
| Quality Assurance | Dependent on skill level | Guaranteed by professionals |
Key Considerations Before Deciding
- Your Skill Level
If you lack experience with roofing or construction projects, hiring a professional is likely the safer choice. - Project Complexity
Some roofs have steep slopes or unique designs that require specialized knowledge. In these cases, professional assistance is critical. - Budget Constraints
While DIY may save money upfront by eliminating labor costs, mistakes can lead to expensive repairs later. - Local Building Codes
Professionals often handle permits and adhere to local regulations. Failing to comply with building codes during a DIY job could result in fines or complications when selling your home.
Final Thoughts on Choosing Between DIY vs. Professional
Replacing your roof is a significant investment that impacts your home’s safety and value. While tackling it yourself may seem appealing from a cost perspective, consider whether you have the necessary expertise and resources for such an involved project before proceeding. For those seeking long-term durability and peace of mind, hiring a reputable professional roofer remains the most reliable option for success.
- Comprehensive Cost Overview for Manchester NH Roofing and Roof Replacement in 2025
- 15 Steps to Choosing the Right Manchester NH Roofing Contractor for Your Home
- A Comprehensive Guide to Manchester NH Roofing: How to Properly Roof a House Yourself
- The Ultimate Guide to Choosing the Right Roofing Contractor Manchester NH for Your Needs
- Tips for Choosing the Best Roofer Manchester NH Has to Offer
- How to Identify When to Choose Roof Installation Manchester NH Over Repairs
- 7 Essential Tips for Choosing the Right Manchester NH Roofing Contractor for Your Home
- A Comprehensive Guide to Roof Installation Manchester NH: How to Know When It’s Time to Replace Your Roof